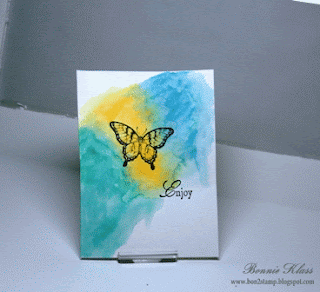
Last week I posted this card that was inspired by this card in the Stampin' Success magazine. Thanks for the wonderful inspiration Aimee. I had so many wonderful comments and several requests for a "how to". So here goes. It took several tries to get some decent pictures and a decent outcome. Here's the finished card. Read on for the tutorial.
Watercolor Splotches Card
All supplies used are Stampin' Up!
Supplies for design:
Paper: Shimmery White, Basic Black
Ink: 3 colors of Re-inker
Jet Black StazOn
Stamps: Papillon Potpourri, You're a Gem (retired)
Other: Aqua Painter, Palette (non SU) (You can use a plastic lid if you don't have a palette.),
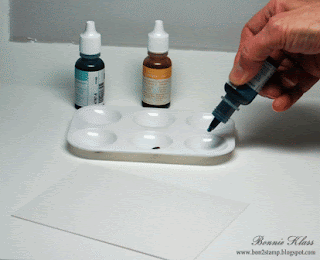
2. With an Aqua Painter, squeeze 1 drop of water in each drop of re-inker.
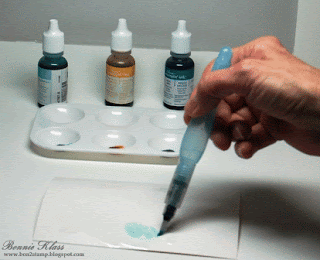
3. Wet paper (5" x 3 1/4") with the Aqua Painter. You want it wet but not puddled. You don't have to do the entire sheet. Only do the area you want colored.
4. Paper is wet. Notice that there are some little drips. If it's too puddled, gently mop up some of the excess.
5. With a wet but not drippy Aqua Painter, pick up some of the lightest color.
6. Paint the color on the wet card surface. Keep adding color until you like the results.
Clean brush on a paper towel.
7. Add the second color in the same manner, overlapping and blending the colors.
Clean brush on a paper towel.
8. Add third color and blend with the middle color.
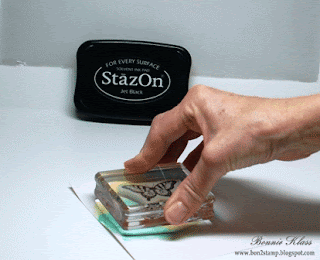
10. When dry, stamp with StazOn ink.
11. Ready to put on a card. But wait, it needs something else.
12. I went back and added some more Pool Party and Island Indigo. Much better.
I matted the design on a 5 1/8" x 3 7/8" piece of Basic Black then mounted all that on a piece of cardboard from the DSP cut in a tent fold.
Added some Basic Pearls, colored with my black Sharpie, to the butterfly and some Basic Rhinestones on the watercolor.
I've experimented with some other colors, but I didn't like any of them as much as this trio. I'm going to keep trying and do some different "moves" with the water and color.
I hope you've enjoyed this tutorial and will give it a try. Be sure to let me know if you do so I can see.
I'm so glad you stopped by! Come back soon!
Enjoy!


13 comments:
So pretty, Bonnie. I'm with you, I love those colors. Good job with the tutorial and thanks a bunch.
Have a great weekend.
Bonnie, it's simply gorgeous and I can't thank you enough for the tutorial on how you did this!!
Every night before going to bed, I look at the latest Stampin' Success mag and always go back to that one and wonder - how did she DO this!!!
Now I know and I WILL be trying it!
LOVE IT!
lynn
Thanks for this great tutorial. I've been concentrating on getting the ink pads and only have two reinkers (so far) but when I do get some, I definitely want to give this a try!
Thanks for the tutorial, Bonnie. Look forward to trying this technique!
Great tutorial Bonnie and VERY effective card
Thanks so much for the tutorial, Bonnie!! I love the effect this technique creates. I'm definitely trying this!!
Bonnie, I loved your original card so much so am thrilled you did this tutorial. I don't have any reinkers but am wondering if it would work with alcohol inks - might just have to experiment!
Great Tutorial Bonnie! I love your creations! :)
Bonnie this is GORGEOUS!!! I LOVE the soft pretty colors you used! Stunning card!! I've got to give this a try!
Great tutorial, Bonnie! Thanks!
I had to come check out this tutorial and see how it was done. I have some of those aqua brushes, but have never really done anything with them. This looks like a technique I could maybe try out a little. I like this butterfly and its background. Today's (3/25/14) poppies are just stunning. Oh... crud. I need Staz On ink though, huh? That stuff NEVER works for me. Maybe I'll rethink that. Or just make sure the background is good and dry.
Great tutorial, and I must have missed it first time out. Looks like something I might could handle, so thanks for taking time to write this up. It yielded fantastic results..for you at least! I'll be back with you on how well I can do it! Thanks Bonnie. Your card is lovely.
Great Tutorial thank you vey much. I'll try it soon
Constanza Beebe
Post a Comment